
Blogging about tech is fun. Having your own blog allows you to help others, polish your skills, and maybe get you a job.
Blogging on popular tech sites is great. Obviously you’re reading this on Hackernoon, so you know I do it. It’s fun. But having your OWN site to manage your content is important as well. This gives you the freedom to do things exactly as you want, try out weird applications and patterns, and experiment.
If you follow this tutorial, you can have your own statically hosted blog for $5 a month. All you need is a domain name.
Creating a New Machine
We’ll start by creating a virtual machine (they call it droplet).
Click “Create” and select “droplet”.
I’m choosing FreeBSD for this, and if you decide to choose Linux, the instructions are pretty similar.
Choose the $5 per month option:
If this is a new blog, it will be plenty of power. Select the data center region that’s closest to you.
For authentication, I use ssh. This just means you’ll need to generate keys on your machine and upload the keys to Digital Ocean. But it’s a far more secure option for communicating with your machine.
Note: Here’s a good tutorial on how to generate ssh keys in Windows, Linux, or Mac.
Add in your SSH keys, and you’re ready to go.
Creating DNS Entries
You’ll need to create some DNS entries. I use Route53 for DNS, but you can use Digital Ocean for DNS into your droplet as well.
Just make sure your domain is mapped to the IP address of your droplet/server.
Logging Into Your System
Now let’s log into the droplet. Since I’m using FreeBSD, I’m going to update it.
freebsd-update fetch install
Next, we’ll install Git and Nginx.
pkg install git
pkg install nginx
Then we’ll run rehash, so the commands are available.
rehash
Adding Firewall Rules
You’ll want to set up a few rules for your firewall.
Use the following commands to make changes to your sysrc:
sysrc nginx_enable="YES"
sysrc firewall_enable="YES"
sysrc firewall_type="workstation"
sysrc firewall_myservices="22/tcp 80/tcp 443/tcp"
sysrc firewall_allowservices="any"
Then start up the firewall.
sudo nohup service ipfw start >&/tmp/ipfw.log
Start up Nginx:
sudo service nginx start
You should see this:
Now Nginx is up and running on your machine through an HTTP connection.
Setting up Your Development Machine
We will use Hugo for static site generation. Depending on your development machine environment, the installation is a little different, so rather than repeat the install instructions for each platform (Windows/Mac/Linux/BSD) just follow the instructions here:
You’ll need to install Golang on your system.
Then install Hugo
Make sure Git is installed on this machine as well.
Also read: Spotify User? Guide To Cancel Spotify Premium SubscriptionCreating a New Hugo Website
Now, let’s create a new website. Mine is called “sillyblog” so I run the following command:
hugo new site sillyblog
Hugo does not give you a default theme with your blog, so you will need to find a theme that you like.
Then you just git clone your theme into the /themes folder within the folder you just created.
I’m using the “Hugo Dusk” theme so it looks like this:
cd sillyblog/themes
git clone https://github.com/gyorb/hugo-dusk.git
Now, I need to add the theme to my config.toml file. This will depend on the name of the theme you install. Most of the time, it’s the same name as the .git file.
echo 'theme = "hugo-dusk"' >> config.toml
Now let’s create our first post:
hugo new posts/my-first-post.md
Note the file name makes the URL. So my URL will be
domain.com/posts/my-first-post/
This is important to keep in mind for SEO purposes.
Open up the file content/helloworld.md
It will look like this:
---
title: "Helloworld"
date: 2020-02-29T00:24:30-08:00
draft: true
---
Here you can edit your first post.
You want to change draft: true to draft: false when you’re ready to publish.
hugo serve
Cool, now we have a blog running on our local machine.
You can cancel out of the service, and to generate a new site, just type in
hugo
Your website will be generated into the “public” folder.
Setting up Deployment
create a github repository
go back to the /public directory of your blog (for me it’s “sillyblog”)
Initialize the repository.
git init
Then, do your first commit.
git commit -m "first commit"
You will need to add the remote origin of your blog on github. For me, I named it “simpleblog” but your name will be different.
git remote add origin https://github.com/JeremyMorgan/simpleblog.git
Then push the files up to Github. (Note you can remove the Github step if you want and push it directly to the server).
git push -u origin master
Now you should see your files pushed up to your Github repo.
Setting up Our Server
Now we need to set up our server. Make a folder for the new site, and replace “example.com” with the name of your website.
mkdir -p /usr/local/www/example.com/html
Make sure and change the ownership of the directory to www for Nginx.
sudo chown -R www:www /usr/local/www/example.com
Now you can clone your site directly into that folder. (This is what you’ll do every time you publish.)
git clone https://github.com/JeremyMorgan/simpleblog.git /usr/local/www/example.com/html/
Finally, You’ll need to edit your nginx.conf so that your domain name will be directed to that folder.
vi /usr/local/etc/nginx/nginx.conf
And add in the following: (replace my domain name with yours)
server {

access_log /var/log/nginx/sillyblog.jeremymorgan.com.access.log;

error_log /var/log/nginx/sillyblog.jeremymorgan.com.error.log;

listen 80;

server_name sillyblog.jeremymorgan.com;

location / {

root /usr/local/www/sillyblog.jeremymorgan.com/html;

index index.html index.htm

}

}

}
This will likely be somewhere towards the bottom of the file:
Now save the file and reload Nginx:
service nginx reload
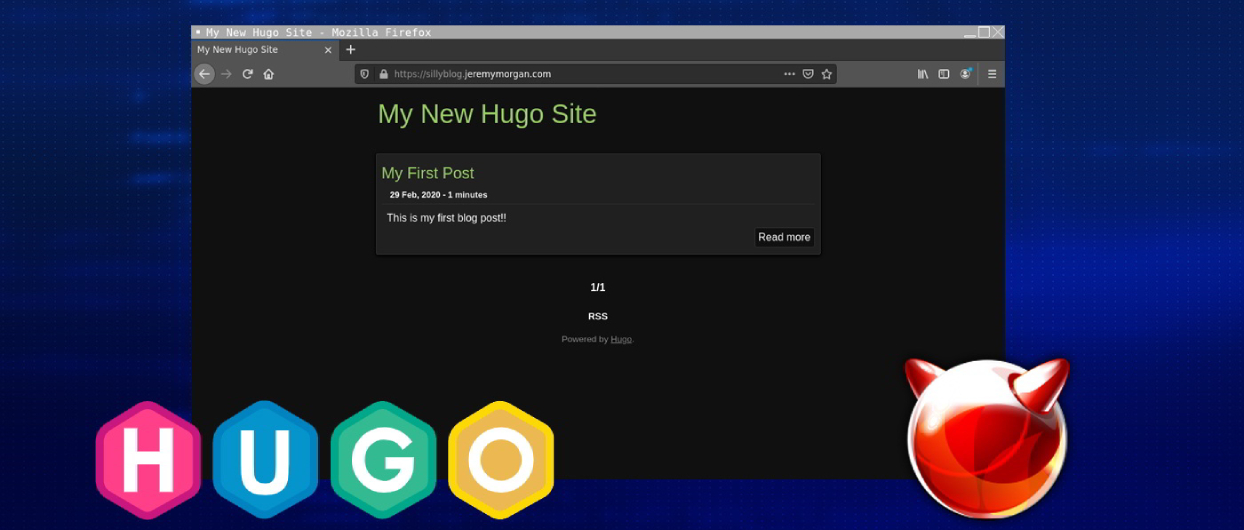
And Viola! Our site is up!!
But it’s HTTP on port 80. Can’t have that.
Installing Let’s Encrypt for SSL
We’ll install a certificate with Let’s Encrypt. One of the cool things about Let’s Encrypt is the cert is free (though you should donate), and certbot will pretty much do all the configuration for you.
You need to install certbot:
pkg install py37-certbot-dns-digitalocean
pkg install py37-certbot-nginx
Then, run it with the — nginx flag:
certbot certonly --nginx
It will ask you some questions:
Then it will automatically make modifications to your Nginx conf:
And finally, the site is up, with https!!
Conclusion
In this tutorial, we:
- Set up a Digital Ocean VM
- Installed Nginx
- Installed Hugo on our local machine
- Created a new site with Hugo
- Used Git to push it to our new server.
This workflow can vary, but this is enough to get started. In this workflow, we build artifacts on a local machine and use Git to store the artifacts and move them to the server. Another (better) alternative for you might be to store the entire Hugo folder in a git repo, and then commit that to the server and build your artifacts after that.
I didn’t want to load up this tutorial too much, but in future tutorials, we’ll set something like that up, and set up some CI/CD tweaks to it.
Top 10 News
-
01
Top 10 Deep Learning Multimodal Models & Their Uses
Tuesday August 12, 2025
-
02
10 Google AI Mode Facts That Every SEOs Should Know (And Wha...
Friday July 4, 2025
-
03
Top 10 visionOS 26 Features & Announcement (With Video)
Thursday June 12, 2025
-
04
Top 10 Veo 3 AI Video Generators in 2025 (Compared & Te...
Tuesday June 10, 2025
-
05
Top 10 AI GPUs That Can Increase Work Productivity By 30% (W...
Wednesday May 28, 2025
-
06
[10 BEST] AI Influencer Generator Apps Trending Right Now
Monday March 17, 2025
-
07
The 10 Best Companies Providing Electric Fencing For Busines...
Tuesday March 11, 2025
-
08
Top 10 Social Security Fairness Act Benefits In 2025
Wednesday March 5, 2025
-
09
Top 10 AI Infrastructure Companies In The World
Tuesday February 11, 2025
-
10
What Are Top 10 Blood Thinners To Minimize Heart Disease?
Wednesday January 22, 2025
Related Posts

Development
Why PowerPoint Roadmap Software Beats Manual Slide Decks For...
By: Ankita Sharma, Wed June 17, 2026
Regardless of how experienced you are, creating roadmaps or strategy slides in..

Development
Server Disposal In 2026: What IT Teams Need To Know
By: Ankita Sharma, Tue April 7, 2026
The server refresh cycle is one of the most significant and most poorly managed..

Development
How To Make Smart Software Development Decisions For Long-Te...
By: Neeraj Gupta, Sun March 15, 2026
Many companies consider that software success generally depends on coding..

Development
How Android App Development For Travel Industry Creates Comp...
By: Neeraj Gupta, Sat February 28, 2026
The travel industry has experienced a comprehensive digital transformation, but..

Development
Agentic AI In Software Development: From Theory To Real-Worl...
By: Neeraj Gupta, Sun February 8, 2026
Modern software development faces a growing challenge: how to create systems..

Development
What Are The Top-Rated Waste Management Software Solutions? ...
By: Ankita Sharma, Tue January 20, 2026
Waste management services require coordinated efforts that could get easier..
Subscribe
0 Comments